Quickly and easily design and order a donor template for precise CRISPR-Cas9 gene editing!
Rapidly design and order custom donor plasmids for insertion of fluorescent markers or custom inserts, or generate custom-synthesized ssDNA donor oligonucleotide (oligo) templates for precise insertion, removal, or replacement of genomic DNA.
- Leverage the power of CRISPR-Cas9 genome engineering to make a precise change in a target gene sequence for human, mouse, or rat
- Donor oligo modified with two phosphorothioate bonds on the 5’ and 3’ ends to provide a > 2-fold improvement in knock-in efficiency (vs non-modified oligo
- Donor oligo length of up to 150 bases allows for sequence insertion, removal, or replacement, and symmetric or asymmetric donor oligo configuration
- Design a plasmid donor for insertion of an mKate2 or EGFP fluorescent marker or a fully custom insert at any desired genomic site
- Intuitive interface lets you accurately design and visualize changes to the gene as well as the finished DNA template
Following a double-strand break (DSB) by CRISPR-Cas9, homology-directed repair (HDR), is a repair pathway that requires a donor template with sequence homology adjacent to the desired genomic modification site. A well-designed donor template can introduce precise alterations to the genomic sequence to facilitate nucleotide insertion, removal or replacement. The Edit-R HDR Donor Designer facilitates straightforward donor template design for your gene of interest.
Here’s How
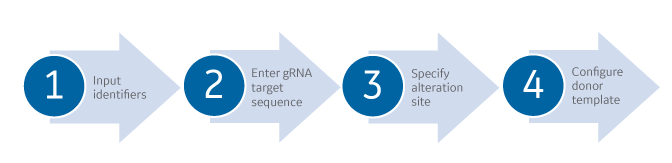
First, use our online CRISPR Design Tool to design and order the CRISPR-Cas9 guide RNA required to cut the genomic DNA in close proximity to the desired modification site. Next, use the Edit-R HDR Donor Designer for rapid generation of the donor template to complete your HDR experiment:
- Input gene identifiers for your desired target
- Organism
- NCBI gene ID or Gene symbol
- Enter the target sequence for the gRNA that will be used to cut the genomic DNA
- Specify the desired genomic site to be altered
- Oligo donors: Designate a sequence to insert, remove or replace
- Plasmid donors: Indicate the site of mKate2, EGFP, or custom sequence insertion
- Configure your desired DNA template(s), add to your cart and check out!
ssDNA Donor Oligo Design and Ordering
The process of designing your donor template begins with the guide RNA sequence directing the DSB. If you have not already created a guide RNA and tested for efficient CRISPR Cas9 cutting, we recommend utilizing the CRISPR Design Tool before continuing.
In the Edit-R HDR Donor Designer, enter the following information to specify your target region for HDR:
- Organism: Select from over 30 species from the drop-down menu
- Gene target: Enter a gene ID or symbol, select the correct entry from the drop-down
- The gene’s primary transcript will be displayed by default. You may select a different transcript from the drop-down if necessary
- Enter or paste the 20 nt Guide RNA targeting sequence
- Click Show Insert Region to display the genomic DNA region surrounding the specified gRNA target site
Within the displayed target region of the genomic DNA, you will see the relative position and alignment of the gRNA (grey arrow), the cut site (vertical bold line within grey arrow), and an orange slider to be used to define the site of insertion, removal, or replacement.

For Insertion:
- Drag the orange slider to the desired insertion position
- Enter the desired insert sequence into the “Sequence to Insert” box. It is recommended not to exceed 100 nt.
- Adjust the left and right homology arm lengths to the desired parameter (default length is 30)
- Note: the complete donor oligo cannot exceed 150 bases
- Click on Generate primers to generate the donor oligo sequence
- A warning message will appear if your insert results in a frame shift and red highlight on the donor sequence(s) will indicate the site of the shift
- Use checkbox(es) to select the desired donor oligo sequences for synthesis
- Note: synthesis scale does not indicate the final quantity of DNA. Contact Scientific Support if assistance is needed
- Check the box to include stabilizing modification, if desired (5´ and 3´ phosphorothioate linkages on two terminal bases)
- Recommended for improved functionality
- Click Add to Cart
- Proceed to checkout to place your order
For Removal or Replacement:
- Click on the lock symbol to unlock the two halves of the slider
- Drag the left-side slider bar to the desired 5´ position to specify the first base to be removed or replaced
- Drag the right-side slider bar to the desired 3´ position to specify the last base to be removed or replaced. The sequence to be removed will be displayed under “Sequence to Remove”
- If making a replacement, type the sequence to be inserted into the “Sequence to Insert” box. If making a deletion, leave the box blank
- Adjust the homology arm length to the desired parameter (default length is 30)
- Note: the complete donor oligo cannot exceed 150 bases
- Click on Generate DNA Donor to generate the donor oligo sequence
- A warning message will appear if your insert results in a frame shift
- Use checkbox(es) to select the desired donor oligo sequences for synthesis
- Indicate the desired synthesis scale and a purification method (if desired)
- Check the box for stabilizing modification, if desired
- Note: we recommend stabilizing modifications
- Click Add to Cart
- Proceed to checkout to place your order
Plasmid Donor Design and Ordering
The process of designing your donor template begins with the guide RNA sequence directing the DSB. If you have not already created a guide RNA and tested for efficient CRISPR Cas9 cutting, we recommend utilizing the CRISPR Design Tool before continuing.
In the Edit-R HDR Donor Designer, enter the following information to specify your target region for HDR:
- Organism: Select from over 30 species from the drop-down menu
- Gene target: Enter a gene ID or symbol, select the correct entry from the drop-down
- The gene’s primary transcript will be displayed by default. You may select a different transcript from the drop-down if necessary
- Select a Sequence to Insert; either mKate2, EGFP, or Custom. If you select Custom, you will be prompted to enter the DNA sequence of your custom insert for the purpose of primer design. The DNA insert itself will not be provided (synthesized) as part of your order.
- Enter or paste the 20 nt Guide RNA targeting sequence
- Click Show Insert Region to display the genomic DNA region surrounding the specified gRNA target site
Within the displayed target region of the genomic DNA, you will see the relative position and alignment of the gRNA (grey bar), the PAM sequence (grey arrow tip), the cut site (vertical bold line within grey bar), and a slider to indicate the site of insertion.

For Insertion:
- Drag the slider to the desired insertion position
- Click on Generate primers to generate the primer pairs for amplification of the homology arms
- Use checkboxes to select the Forward and Reverse primer pairs for the 5? and 3? homology arms.
- Note: Only one primer design will be available for the insert-adjacent end of the homology arm. The resulting homology arm length is indicated for each of the primer pairs.
- Click Add to cart
- Proceed to checkout to place your order
Schematic of HDR plasmid donor assembly

Figure 2 - a visualization of the custom donor plasmid generation workflow. First, custom designed homology arm primers are used to PCR amplify homology arms (with flanking adapters for directional assembly). Second, the homology arms, mKate2 insert and the vector backbone are assembled into the desired donor plasmid.